 Ok so the title is a bit misleading on two fronts...
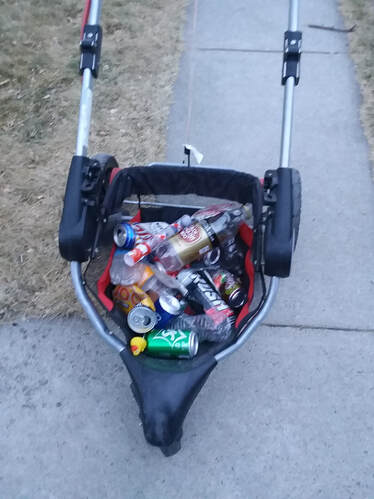
I picked up all that over the course of two walks I went on with the child seeking some outside time for myself and the dog as well. I would also like to emphasize that I didn’t even go out of my way to pick all that up, it was either on the sidewalk or right next to it as I walked. I tell you this so I can make a confession I don’t normally pick up trash and recycling I find on my walks. I know shocking right…. How can someone who built and writes on a website called the Green Living Library not make it a habit of picking up loose trash wherever they see it? Since I am being entirely honest, there are two reasons why this is not a habit for me.
Legal vs Moral From a legal perspective, unless that trash ends up in the immediate vicinity of my house it’s not my problem. It has to be on my property before I legally have to give a crap about it. This seems to be true of most cities, if it’s not in the street it’s the problem of the property owner. So while I am not legally obligated to pick up trash from the sidewalk in front of other people’s homes I am starting to come around to the fact that maybe I am morally obligated to pick it up. I share that sidewalk, that street, the neighborhood, even the whole town with other people and it seems to me that I have a responsibility towards that community to help take care of the environment it exists in. Public Responsibility vs Private Responsibility The question I am beginning to wrestle with more and more as I grow older is where does public responsibility end and where does private responsibility end? At what point is it my problem and what point it is the public’s problem? Up until recently for the most part I considered everything that was past my property line and didn’t affect my life as not my problem.
Now on the face of it, things like I have listed above, are someone else’s problem. But if everyone takes the it’s someone else’s problem approach to life then a lot of things that need doing don’t get done. I’ve come to the conclusion that the answer to my question about where public and private responsibility end is that, They don’t end…. they are one and the same. There is no private responsibility or public responsibility you don’t get to pick and choose where you are responsible for something and where you are not. If you are a living breathing person then like the rest of us are responsible for every second of your life and every action taken or not taken during that life. So yes maybe someone else is why there is a broken beer bottle on the sidewalk going to a school but if you walk by it without cleaning it up then you are just as responsible for that beer bottle. I know it kinda sucks right….. If you look at the world through the framework of universal responsibility where if you have the power to make it better then you are responsible for making it better then suddenly you have a lot more problems. But that’s ok because along with those problems you also get the power to solve them. Now, this doesn’t mean I expect you to run out and solve world hunger and fight crime, some things are better left to those better suited to solve them. But the next time you see some trash that needs picking up or an elderly neighbors sidewalk that needs shoveling maybe you make that problem yours and in a small way make the world a better place. Whether we want to admit it or not we are all responsible in some small way for how the world is now and that means we are also responsible for how the world will look in the future. I hope for the sake of my child that by the time they are my age they are living in a much cleaner, greener, sustainable world that they won’t fear bringing a kid into like I do. I don’t know what the future holds but I know that one thing I can do is teach my kid to pick up garbage, recycle whatever they can, and live the cleanest, greenest, and most sustainable life that they can.
0 Comments
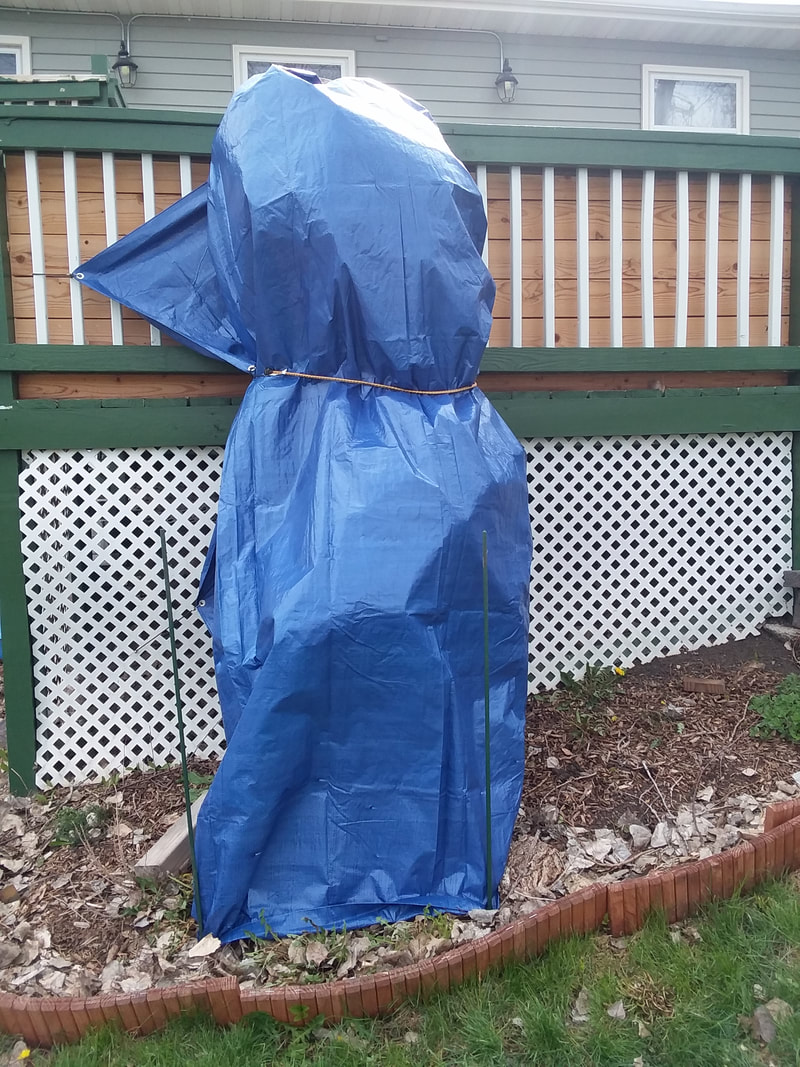
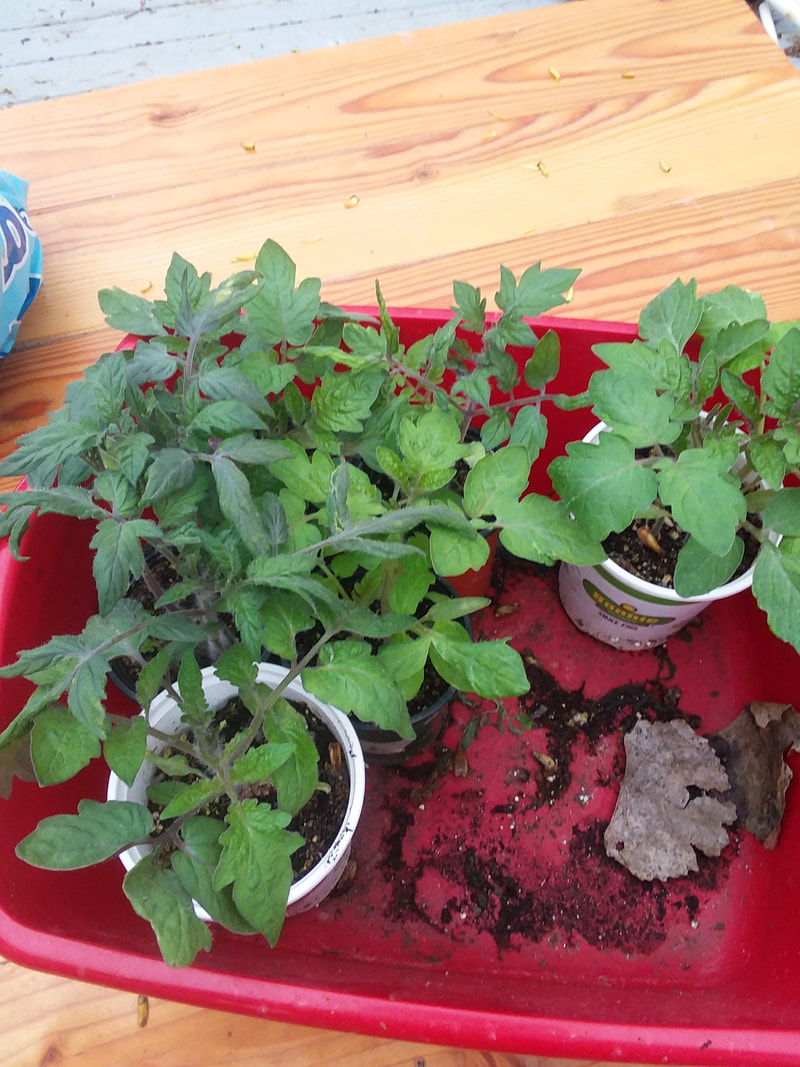
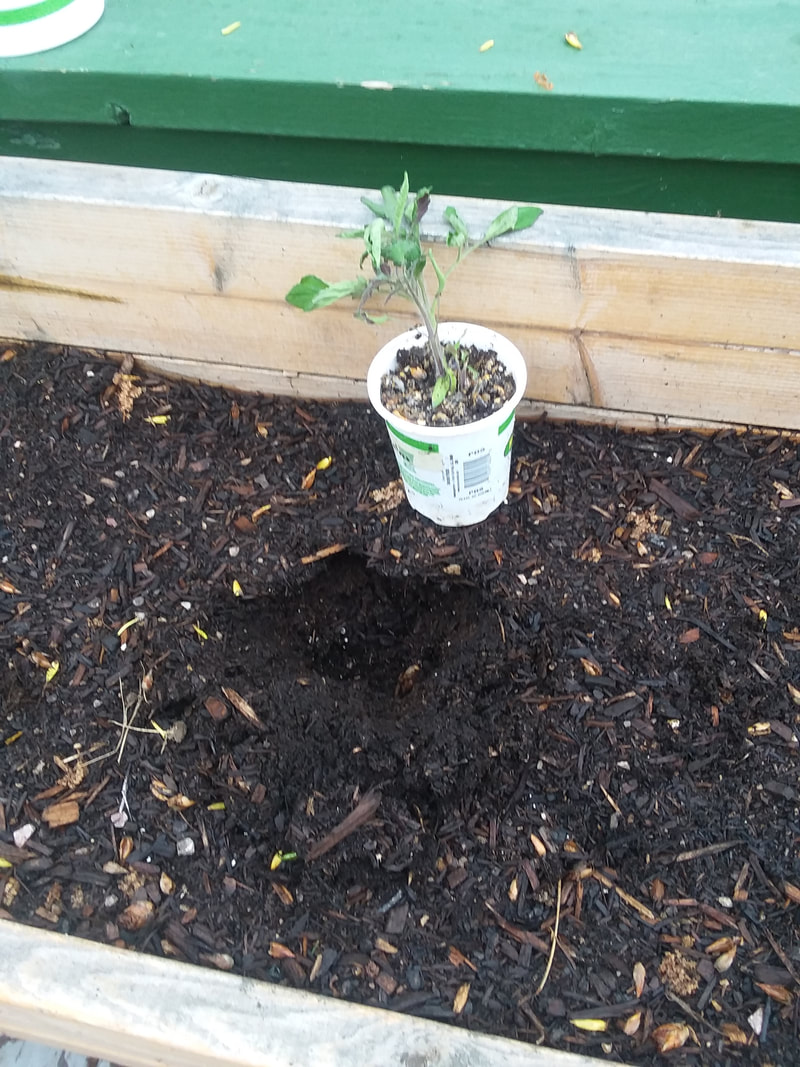
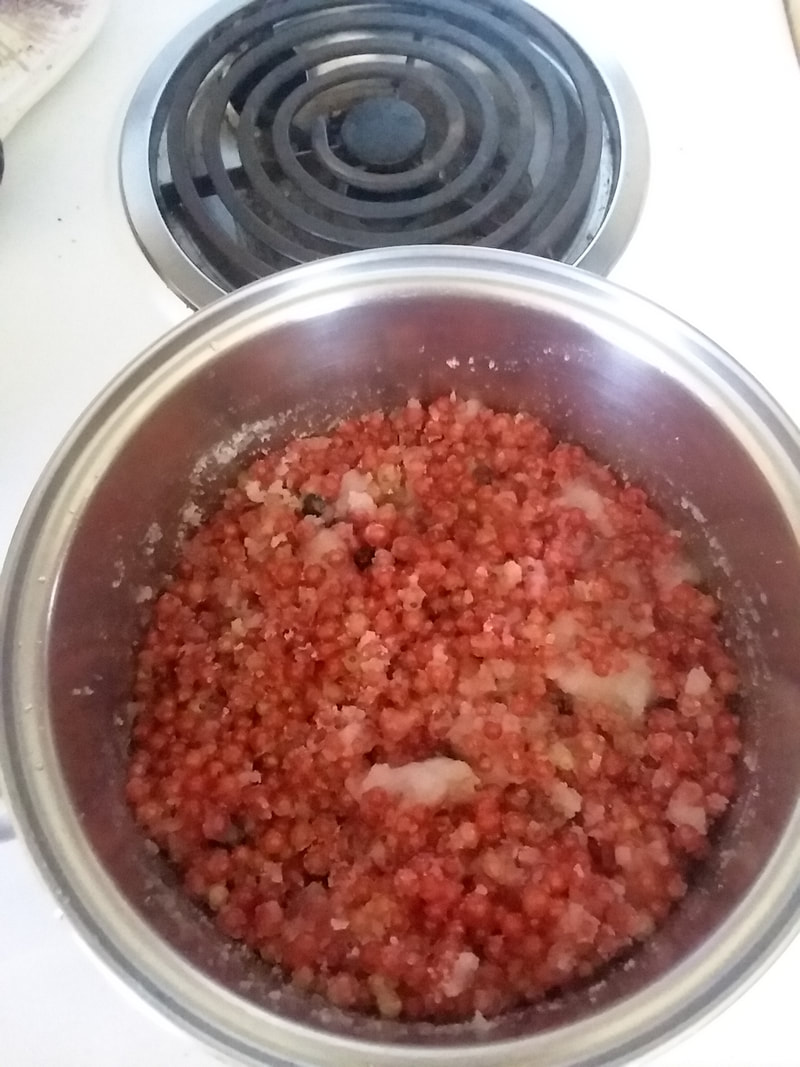 After many years of waiting and bad crops with my currant bushes I managed to get enough off of them to bother making something from them. I plant these bushes 4 years ago and in every year since I have been fighting the birds, the weather and just bad timing trying to get more than a handful of currants. This year I finally did it. I actually have to thank the fact that I am working from home for this. It has really allowed me to monitor my various fruiting shrubs much better than I have in years past. Let me tell I am just a bit surprised by this since the weather this year has been atrocious for my garden. For most of the spring it hovered at or below 32 degrees and it rain/sleeted. Then flipping a complete 180 it jumped up to 90+ degrees for weeks on end with no rain which has turned portions of my garden to something like concrete. and the hail don't even get me started on the hail. 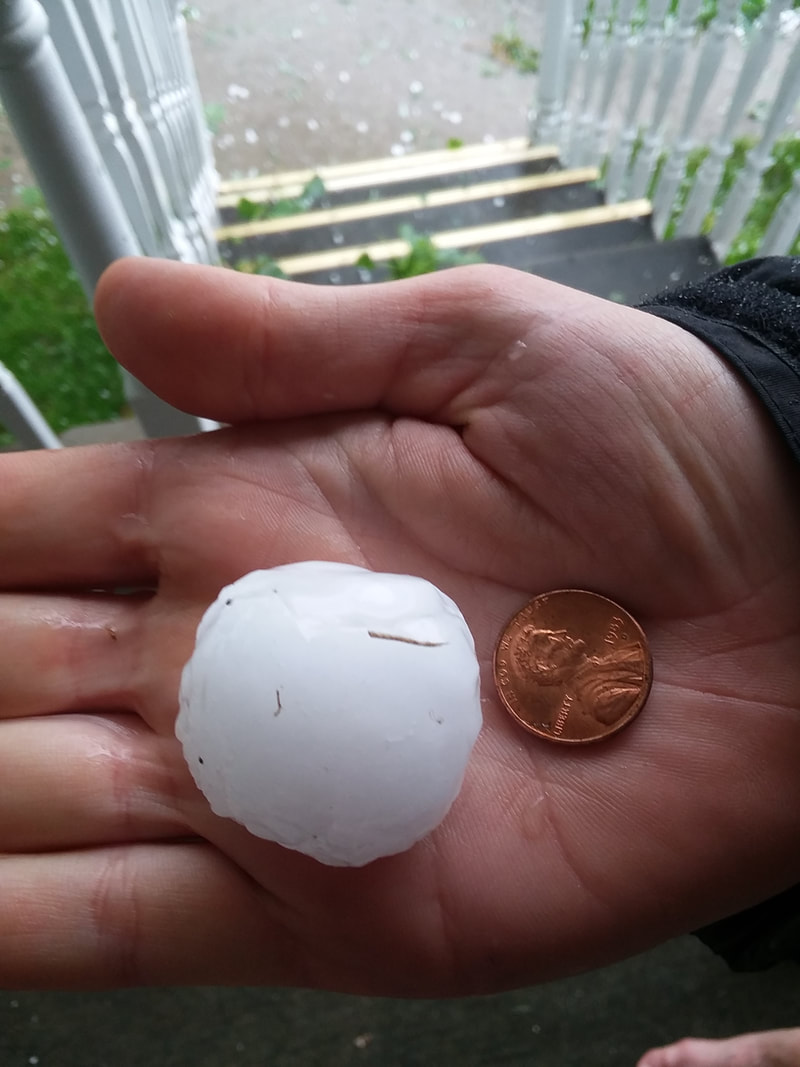 June Hail Storm there have been more since :( '
But I and my garden persevered and push through all the bad weather to finally produce something I can enjoy eating. As I right this the the currants and the sugar is cooking together on the stove top and I really hope it turns out. Being able to produce my own food is part of how I am trying to live a greener life. The more I can grow at my house the less I have to buy which is better for the environment as well as being better for my wallet. For this particular foray in jam making I am using a simple recipe I found at the The Spruce Eats. https://www.thespruceeats.com/red-currant-jam-recipe-1327858 What I liked about this recipe is that it also gives the amounts in grams and ml which makes it much easier to adjust to the amount of currants I have, and here at the Green Living Library stuff that is simple to use and change is gold to us. That's all for now
Growing a garden in an apartment or other small space is the ultimate test of plant growing ingenuity. When most people think of growing something indoors they think they need a nice sunny window to put the plants in. While a bright sunny window is nice to have it is by no means the only way to grow a garden in an apartment anymore.
With the advent of low cost, long lasting LEDs you can grow a garden just about anywhere without it costing a substantial amount of money. Just as an example you can see in a picture below where I grew cherry tomatoes and salad greens all winter long in an otherwise very dark room. This room hardly got any daylight into it and certainly none on the wall where I put the pots. 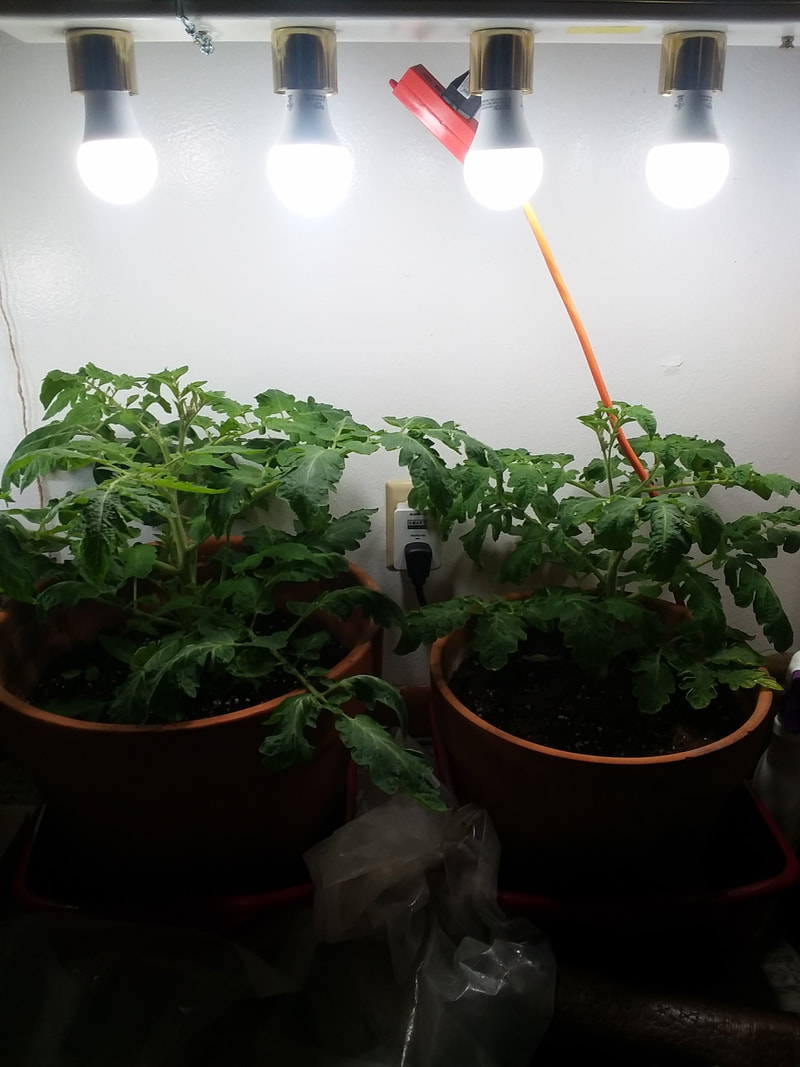
If you want to grow a garden inside then what you want to do is maximize efficiency in the following ways,
Lights When it comes to growing food inside I find it is best to start with your light setup. You want something that is adjustable in height so it can be raised or lowered according to plant height. It is important to keep lights just above the plant you are growing because this will get the most light to impact the plant leaves. Even with today's LEDs you still need to be close to the plant to offset the fact that light bulbs are not the Sun. Light systems can be purchased commercially like this one or you can make your own from DIY parts. The commercial bought systems are not cheap but they come with all the bells and whistles and come with bulbs specifically tuned to produce light in the wavelengths plants need for photosynthesis. A DIY system is not for the faint of heart and I do not recommend them unless you are comfortable with doing your own wiring. That wiring can be as complicated as actually wiring up an entirely new light system or just modifying an existing one. The one seen in this photo below was my approach since I could get the parts for a very low cost. It consists of an old bathroom vanity light wired up to be plugged into a wall receptacle instead of being hardwired. 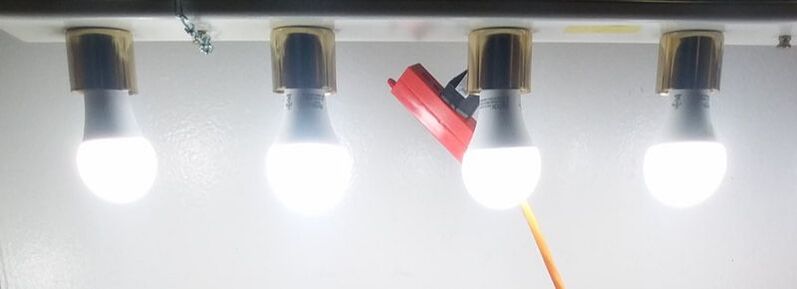
Just to reiterate if you are not confident in your ability to do electrical wiring or you live in a location that doesn't allow it,
DON'T DO THIS and I am not liable if you do and something bad happens. If you assemble your own grow lights you can either do something like I did you can use what I call a shop light setup. Doing it this way can be nice because you can get the same LED technology in these and they are built in a way that puts light where you want it. You can also get these with a receptacle plug pre-installed so that means no wiring for you which can be a stress reliever. When you buy the bulbs make sure to get ones that are at least 100 watts and in the daylight part of the light spectrum. These bulbs will put out a bright white light instead of the softer more yellow light usually found in most home lamps. An example of what I mean for the standard A21 bulb is below. 
Growing Medium
The choice of what to grow your plants in can have a dramatic effect on the cost of the setup and the ongoing effort to make it work. In terms of expense the bottom of the shelf is just regular potting soil you would use in a pot. Most potting soils are soil less and are instead a mixture of organic and inorganic parts. Some of the most common potting soils are made from peat moss, vermiculite, and perlite which are all great at holding water and nutrients for the plant to use. The next step up is to use a hydroponic system that flushes a nutrient rich water over plant roots periodically. This system requires something for roots to anchor on like, clay pebble, coco chips, pine shavings or just plan old river rock. These systems are nice because they tend to be lightweight unless you use rock and you get very good production when compared to a potting soil setup. They do come with more expense because you have to supply extra nutrients, buy pumps and timers to regulate water flow and they use more electricity than a potting soil system. The step up from that is aeroponics which is basically hydroponics that does away with the growing medium altogether. It used fine misters to spray plant roots with a fine nutrient rich mist. It can work great when it works but this system is highly dependent on nothing going wrong. A power loss or a water supply failure causes the roots to dry out in minutes and you can lose a crop just as fast. So aeroponics is not for the faint of heart or for people that like to set it and forget it. To put these systems in terms of ease of use and likelihood of failure I would put them in the same order as expense. The addition of a water/nutrient holding medium in the first two systems reduces the chances of total failure. You have more time to catch and fix whatever is going wrong in the system. What I would do If I was a new indoor gardener I would set up the following system. I would use a soilless potting soil with a built in catch basin to hold extra water. I would place them under pre-purchased shop lights because of the ease of setup and the ability to raise and lower the lights easily. If I had the room I would multiple shelves of produce from floor to ceiling with 3 feet between each shelf. This should give enough room for most plants to grow while providing clearance for the lights. The plants I selected would most likely be any or all of the following,
I picked them because they continually produce and they don't need any pollination to produce. Hopefully, this gives you some ideas or inspiration to start growing your own indoor garden this winter so you can enjoy fresh produce all winter long.
Having a garden is not just for those who have large plots of land that they can till up and plant seeds in. Even someone with no more space than a deck can have a bountiful container garden that can produce just as much and in some cases more than a garden planted in plain old dirt. This is possible because you can tailor the soil medium for maximum growth and place the pots where they can get the perfect amount of heat and sunlight. There are a few things to consider when establishing a container garden.

Containers
There are two basic categories of containers you can use for planting a garden on a deck. Pots Planter boxes. I seperate them out because pots come premade in many different styles, materials, sizes and can be moved once full. While planter boxes are typically built on site and are too large to easily move once they are full of soil. Pots You can get pots these days in many sizes and materials. They can range in price from cheap plastic to more expensive terracotta and ceramic. In my deck garden I mostly use terracotta pots for the following reasons,
Plastic pots can have some benefits as well as being cheaper than terracotta in most cases and are better at holding moisture for people who water infrequently. Pot Size When it comes to container gardening for most plants bigger is always better. This is because the more soil or other growing medium you provide the better the plant will grow. I dont grow anything in a pot smaller than 12 inches now and most of my pots are actually bigger than that. Smaller pots can be quite successful for herbs but keep in mind that if you vary your pot size too much it can play hell with a watering timetable. Small pots on hot days in the sun can need water multiple times a day while larger pots suffice with one watering a day. If you are starting from scratch I would try to pick a once size pot to use so that you can better predict what you watering needs will be. If you want to vary from that once size go bigger since that will in most cases need less watering than the smaller one. 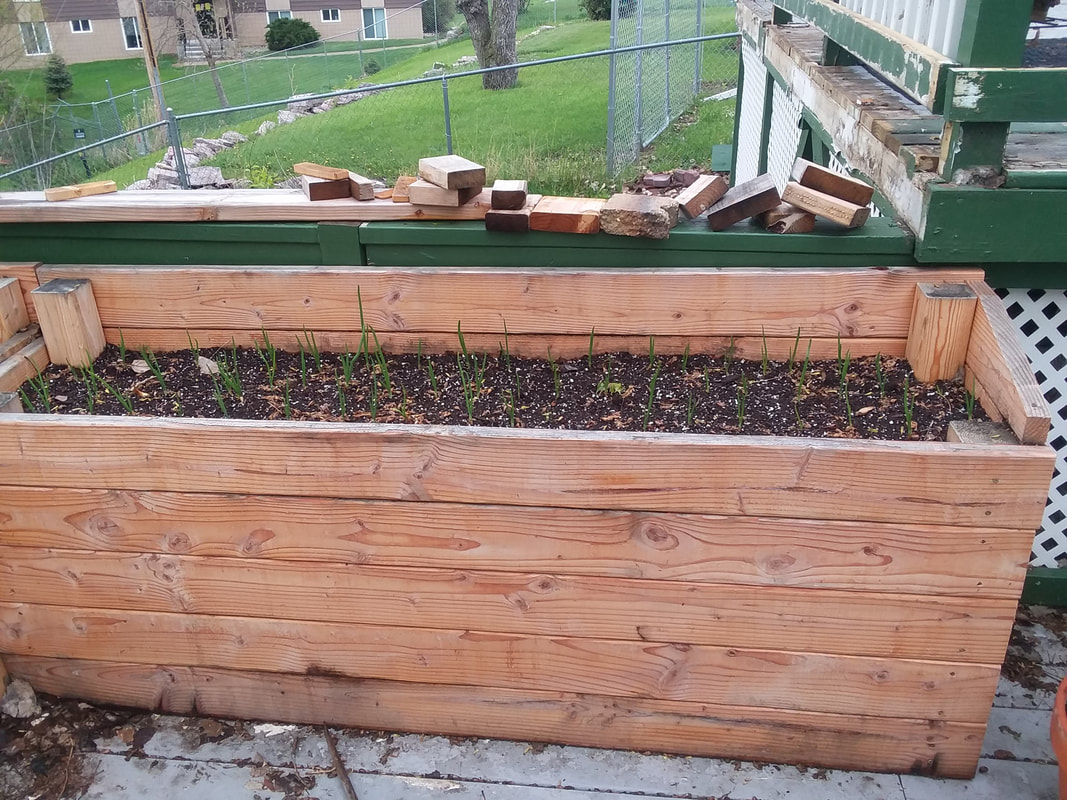
Planter Boxes
If you have the space and a good sunny location for them planter boxes are the way to go in my opinion. They will cost a bit of money and time to build and install but the benefits are worth it if you are serious about having a deck garden. Planter boxes are much better at holding water and providing larger spaces for plants to root into. This will result in stronger plants that need less frequent watering to establish and maintain good production. There are many shapes, styles and materials to build planter boxes out of treated/untreated lumber. Plastic panels, metal watering troughs, old fridges (seen it) pretty much anything you can think of using. I made mine from untreated lumber coated in many coats of raw linseed oil. What to plant You can plant anything you want in container gardens but there are things that will do better in a traditional garden. In my experience the following garden plants are good for pots,
If you have large planting boxes than maybe you can spread out into other crops like,
Watering You can go two ways with watering your container garden. You can water by hand every day or you can set up a timed irrigation system. Both systems have their pro’s and con’s. If you hand water it will most likely happen everyday even if it rains since rain typically can’t get enough water into the pots. It puts you out in your garden everyday which is great for monitoring plant growth and when it comes to harvesting but it does take time everyday. A timer controlled irrigation system is great for those of you with busy lives. It will water your plants automatically once it is set up and all you need to do is check it once a week to make sure it is still working right. This way has a lot more upfront cost and setup time but it is nice to be able to relegate watering duties to a timer. So now that you have my take on what you need to know to start a container garden it is time for you to give it a try yourself. The options and ways to do it are endless so you need to figure out what works best for your situation. If you have any questions about this, send me an email and I will help you out as quickly as I can. For more information on how to start a container garden check out some of my other articles here on the Green Living Library. Sources https://lancaster.unl.edu/hort/articles/2002/typeofpots.shtml Its been a rocky start so far with below average temperatures and lots of rain but the 2020 garden is officially in the ground and growing. Hopefully it stays a bit drier than last year so I wont have as many powdery mildew issues. Below is a gallery of some of the pictures from the year so far.
Having a garden is not just for those who have large plots of land that they can till up and plant seeds in. Even someone with no more space than a deck can have a bountiful container garden that can produce just as much and in some cases more than a garden planted in plain old dirt. This is possible because you can tailor the soil medium for maximum growth and place the pots where they can get the perfect amount of heat and sunlight.
There are a few things to consider when establishing a container garden.
A Brief History
The Mason jar the humble container used for canning and preserving food is capable of being used for so much more than just canning. They were created by a fellow named John Landis Mason back in the 1858 and were among the first types of jars used to preserve food. There were earlier examples of canning food in jars to preserve it but with the advent of the screw on ring and lid really caused the practice to take off. So spring is finally upon us again and you are starting to think about what needs to get the garden planted this spring. There are several things you can do right now to get the process going long before the weather is warm enough outside for the early spring crops.
Sheet mulching defined in its simplest terms is the layering different types of organic materials on top of the ground in order to establish a garden plot without tilling the soil. This technique can be applied to existing lawns, areas with poor soil or even over concrete or solid rock to create “soil” for growing things in.
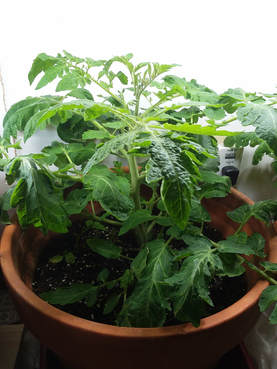 Cherry Tomato Cherry Tomato
Here we are at the end of December and for most us were are long past the end of the growing season and we are enjoying the fruits of our labor. Maybe you are the type of person that is saying finally I can take break and relax a bit or maybe you are like me and are bemoaning the lack or warm sun and rainy nights that led to such a beautiful outside garden.
Even though the weather is getting colder and you know the frost is coming fear not because you can continue to grow delicious food inside your home. With today’s LED light technology it is easier and cheaper than ever before to set up a system for growing food inside all winter long.
The hole in the bottom of the sock tells a person many things. The first of which is the obvious one that you need a new pair of socks. But it also says you and that sock have traveled many miles together and have done many things that you couldn’t have done without that sock. That sock cushioned your heel and protected your ankles from the rough embrace of those new hiking boots you bought. So after traveling so many miles together and now full of holes what can this humble sock do for you now. Most people take this sock and simply discard it in favor of one not so full of holes. I think that is a waste of a wonderful piece of fabric that has lots of life left in it when you look at it in a whole new light.
To that end I am going to tell you about a few different ways you can put a old worn out sock to use around the house. I am just going to come right out and say it I really like plastic shopping bags but not for their intended purpose. I like them because I will admit they can very useful items to have around the house for a variety of reasons. In the spirit of trying to live a greener life I do my best to phase out the use of plastic bags in all their forms but I will be honest enough to admit I don’t always succeed. For me most of the time I simply forget to grab my reusable cloth bags and as much as it annoys me I will take the plastic bags.
So like most people I end up with a big bundle of plastic bags usually underneath my kitchen sink that I have to do something with. I won’t just throw them away because that conflicts with my Reduce, Reuse, Recycle lifestyle so something must be done with them. Overtime I have found a few useful ways in reusing plastics bags in a way that allows multiple uses and sometimes long lifespans. The first couple I am going to touch on are very obvious but I feel like they need mentioning anyways since people insist on buying custom made single use alternatives when a free plastic bag will work just as well. Have you ever had trouble starting seeds in the spring or fall or maybe in the middle of winter if your crazy like me. Well I know I have and I have been searching for a long time for effective seed starting methods that don't involve purchasing something custom made for the job. Items like the Jiffy Greenhouse or the Hydrofarm Germination Station are wonderful tools but they don't provide the versatility I like.
|